Grai Orthopedic Implants Grai Orthopedic Implants

Top 10 Tips for Choosing Hand and Foot Orthopedic Implants

Time:2026-10-08 Author:Mason
0%

Choosing an orthopedic implant for the hand or foot is a clinical decision, not a simple product comparison. Small bones, narrow spaces, tendons, nerves, and daily loading demands can make minor design differences important. A plate that works well in a forearm may feel too bulky near a finger joint. A screw that appears suitable on a catalog page may not match the patient’s bone quality, activity level, or surgical approach.

How to choose orthopedic implants for hand and foot procedures requires careful attention to anatomy, fixation strength, material performance, and documented clinical experience. Surgeons should review imaging, implant dimensions, surface design, sterilization information, and manufacturer quality systems. Patient-specific factors matter too, including diabetes, smoking history, bone density, occupation, and expected rehabilitation. Evidence should guide the decision.

Details matter.

This guide presents ten practical tips for evaluating hand and foot orthopedic implants. It considers titanium and stainless-steel options, low-profile plates, compression screws, fixation systems, and instrument compatibility. It also discusses supplier reliability, traceability, regulatory compliance, and the value of responsive technical support. No implant is ideal for every case. That point is easy to overlook. Even experienced teams can reassess their preferences after reviewing a difficult revision, unexpected irritation, or delayed healing. The strongest choice is usually the one supported by sound anatomy, validated evidence, careful technique, and realistic patient expectations. Consult qualified orthopedic professionals and current device documentation before making clinical decisions.
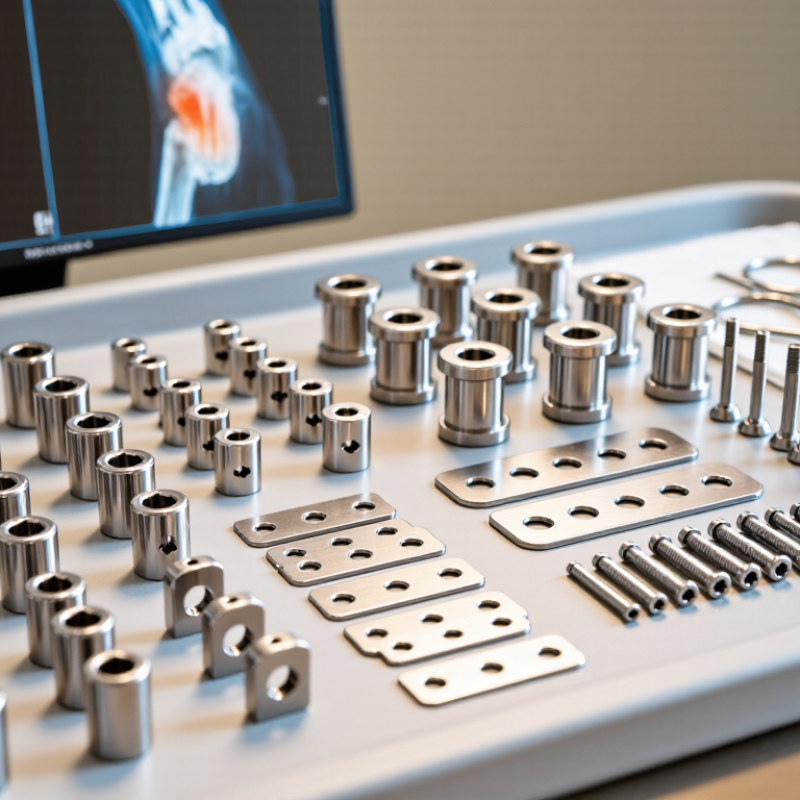
Top 10 Tips for Choosing Hand and Foot Orthopedic Implants

Define the Injury, Deformity, or Condition Being Treated

Defining the injury, deformity, or condition is the foundation of choosing a hand or foot orthopedic implant. A painful toe is not automatically a simple alignment problem. It may involve joint damage, tendon imbalance, nerve irritation, infection, or poor bone quality. The same fracture can also require different solutions, depending on its location, stability, and healing potential.

Tips: Describe the problem precisely. Record the affected bone, joint, tissue, and functional limitation. Ask when symptoms began and whether they followed trauma, repetitive stress, or disease. Examine standing alignment, movement, skin condition, circulation, and sensation. Small details matter, especially in the hand and foot.

Imaging should support the clinical examination, not replace it. Standard radiographs may show alignment and bone loss, while advanced imaging can clarify joint surfaces or hidden fractures. Surgeons should compare imaging with the patient’s pain and daily needs. A radiographic deformity may not be the main source of disability. This is easy to overlook.

Tips: Define the treatment goal before comparing implants. Is the aim stability, correction, pain relief, motion, or load transfer? Consider bone density, smoking status, diabetes, activity level, and expected healing. Implant selection should match the patient, not merely the scan. The first interpretation may be incomplete. Reassessment can prevent an impressive-looking but unsuitable reconstruction. Clear documentation and shared decisions also improve safety.

Compare Implant Materials, Designs, and Biocompatibility

Top 10 Tips for Choosing Hand and Foot Orthopedic Implants

Material selection affects strength, flexibility, imaging, and tissue response. Titanium alloys are lightweight and generally compatible with bone fixation. Stainless steel offers reliable strength and cost control. Cobalt-chrome resists wear but may feel overly stiff in small joints. PEEK can reduce imaging artifacts, yet it may require careful fixation. No material is perfect.

Design must match anatomy and movement. A low-profile plate can reduce irritation beneath thin hand or foot skin. Rounded edges may protect tendons during repeated motion. Screw angles should support stable fixation without entering a joint. For load-bearing areas, fatigue performance matters more than appearance. Fit matters.

Biocompatibility involves more than avoiding immediate allergy. Review corrosion resistance, particle generation, sterilization tolerance, and documented biological testing. Consider previous reactions to metals, bone quality, diabetes, smoking, and expected activity. A skilled surgeon should compare imaging findings with implant geometry and fixation options. Clinical evidence should include follow-up data, not only laboratory results. Some designs look excellent on paper but perform poorly when swelling, abnormal loading, or limited soft tissue changes the situation. That possibility deserves honest discussion.

Top 10 Tips for Choosing Hand and Foot Orthopedic Implants

How to read this chart: Elastic modulus indicates material stiffness. Lower-modulus materials may help reduce stiffness mismatch with bone, while higher-modulus metals provide strength and wear resistance for demanding loads. Values shown are representative room-temperature values and vary by grade, processing method, and implant design.

  • Match the implant design to the anatomy and load requirements.
  • Compare elastic modulus with the surrounding bone to help manage stress shielding.
  • Evaluate tensile, fatigue, and fracture strength for long-term loading.
  • Confirm corrosion and wear resistance in the body environment.
  • Review documented biocompatibility and biological response.
  • Consider surface texture, coatings, and bone-integration requirements.
  • Assess fixation method, including screws, press-fit, or cemented fixation.
  • Check compatibility with imaging and any future revision procedures.
  • Prioritize designs supported by clinical and fatigue-testing evidence.
  • Use patient anatomy, activity level, bone quality, and surgical goals to guide final selection.

Evaluate Size, Fit, Stability, and Surgical Compatibility

Top 10 Tips for Choosing Hand and Foot Orthopedic Implants

Evaluate Size, Fit, Stability, and Surgical Compatibility

Choosing a hand or foot implant begins with accurate anatomy, not a catalog image. Measure bone length, width, curvature, and available soft-tissue coverage using clinical examination and appropriate imaging. A few millimeters can affect joint motion, pressure distribution, and wound healing.

Fit must be checked in three dimensions. The implant should contact healthy bone without forcing excessive reaming or correction. Stability depends on fixation quality, bone density, load direction, and the patient’s activity level. A component that looks secure on a static image may behave differently during walking or gripping. Small details matter.

Review the surgical approach before selecting the implant. Confirm that the instruments can reach the site, the trial components reflect the final sizes, and the fixation method suits the planned procedure. Compatibility also includes screws, plates, guides, and imaging requirements. Poor instrument access can turn a straightforward operation into a difficult one.

Patient factors deserve equal attention. Diabetes, smoking, previous surgery, deformity, and limited compliance may change implant selection or postoperative planning. Discuss expected loading and rehabilitation clearly. Avoid choosing the largest implant simply because it appears more stable. Oversizing may restrict motion or irritate surrounding tissue.

No checklist is perfect. Surgeons should compare measurements with intraoperative findings and remain willing to adjust the plan. That judgment can be uncomfortable. Document the reasoning, review current clinical evidence, and involve the multidisciplinary team when anatomy or fixation quality is uncertain.

Top 10 Tips for Choosing Hand and Foot Orthopedic Implants - Evaluate Size, Fit, Stability, and Surgical Compatibility

Tip Primary Dimension What to Evaluate Practical Selection Check Preferred Evidence Priority
1 Anatomical size Match the implant to the patient’s bone dimensions rather than selecting a size based only on age, sex, or procedure name.
  • Measure the available bone on appropriately positioned radiographs.
  • Use CT when deformity, bone loss, overlapping anatomy, or complex joint geometry limits plain-film assessment.
Preoperative imaging and the system’s verified sizing chart. Required
2 Contour and fit Confirm that the plate, implant body, or joint component follows the native anatomy without excessive prominence or forced bending.
  • Assess dorsal, volar, medial, or lateral prominence according to the surgical approach.
  • Avoid a construct that compresses tendons, neurovascular structures, or adjacent soft tissue.
Trial components, intraoperative visualization, and final fluoroscopic images. Required
3 Fixation stability Evaluate whether the implant can maintain alignment under expected loading while the bone heals.
  • Check the number, direction, and depth of available screw or pin fixation points.
  • Consider bone quality, fracture pattern, osteotomy location, and expected mechanical forces.
Mechanical rationale supported by imaging, bone quality assessment, and the manufacturer’s surgical technique information. Required
4 Screw and hole compatibility Ensure that screw diameter, thread type, head geometry, hole design, and locking mechanism are intended to work together.
  • Do not mix screws or instruments unless the system documentation specifically permits it.
  • Verify drill guides, taps, depth gauges, drivers, and torque-limiting tools before surgery.
Validated implant–instrument compatibility documentation. Required
5 Joint alignment and motion For arthroplasty or joint reconstruction, assess implant geometry, alignment, range of motion, and risk of impingement or instability.
  • Compare component dimensions with the resected or reconstructed surfaces.
  • Check flexion, extension, rotation, translation, and soft-tissue balance intraoperatively.
Preoperative planning, trial reduction, and functional testing before final implantation. Required
6 Material and tissue response Review the implant material and surface characteristics in relation to corrosion resistance, wear, imaging needs, and patient-specific sensitivities.
  • Identify the implant’s declared material and coating.
  • Review any documented material sensitivity, prior implant reaction, or relevant allergy history.
Regulatory labeling, material declaration, and documented biocompatibility information. Verify
7 Bone quality and purchase Adapt implant selection to cortical thickness, cancellous bone quality, osteoporosis, cysts, bone loss, or revision conditions.
  • Use longer fixation, alternative trajectories, grafting, or supplemental fixation only when clinically appropriate.
  • Avoid relying on short fixation in compromised bone when the construct requires stronger purchase.
Radiographic assessment, CT when indicated, and intraoperative bone-quality findings. Required
8 Soft-tissue clearance Consider tendon glide, skin coverage, plantar or palmar pressure, nerve location, and the possibility of postoperative irritation.
  • Place the implant in a position that minimizes prominence at areas with limited soft-tissue coverage.
  • Assess closure without excessive tension and document any need for later implant removal.
Physical examination, surgical approach planning, implant profile data, and intraoperative soft-tissue assessment. Preferred
9 Surgical workflow Choose an implant that can be inserted through the planned approach using available instruments and the surgeon’s established technique.
  • Confirm the required trays, guides, drills, saws, trial components, and backup sizes are available.
  • Check sterilization instructions, packaging integrity, and expiration or use limitations before opening.
Completed instrument checklist and reviewed surgical technique guide. Required
10 Patient-specific risk and follow-up Balance implant selection with healing potential, activity level, infection risk, compliance, and the planned postoperative monitoring schedule.
  • Consider smoking, diabetes, vascular status, neuropathy, previous infection, and occupational or athletic demands.
  • Define follow-up imaging and clinical checks for alignment, union, loosening, migration, infection, and soft-tissue symptoms.
Documented informed consent, patient history, risk assessment, and follow-up plan. Verify
Clinical use note: Implant size, fixation method, surgical technique, and postoperative care must be selected by a qualified orthopedic professional using patient-specific imaging, applicable instructions for use, and local clinical protocols.

Review Evidence, Risks, Recovery, and Long-Term Performance

Top 10 Tips for Choosing Hand and Foot Orthopedic Implants

Review Evidence, Risks, Recovery, and Long-Term Performance

Start with reliable clinical evidence, not attractive claims. Compare studies with similar injuries, follow-up periods, and patient ages. Ask how the implant fits your bone quality, joint movement, and daily demands. A smaller device is not automatically safer. Material, fixation method, and surgical design can affect stability and wear.

Discuss the surgeon’s experience with this procedure. Ask about infection, nerve irritation, stiffness, loosening, fracture, and possible revision surgery. Request plain-language explanations of imaging results. Consider a second opinion when the recommendation feels rushed. Pain relief matters, but preserving movement may matter more for a pianist or warehouse worker. The best option is personal.

Recovery deserves equal attention. Clarify weight-bearing limits, wound care, therapy sessions, driving restrictions, and expected pain changes. Some patients improve quickly; others need months. Recovery is rarely linear. Plan help at home, especially after foot surgery. Ask how follow-up scans will check alignment and bone growth.

Long-term performance depends on technique, healing, body weight, activity, and realistic use. I would not assume “permanent” means maintenance-free. Report increasing swelling, drainage, fever, numbness, or sudden instability promptly. Keep your implant records and ask which activities may shorten its service life.

Confirm Surgeon Expertise, Device Quality, and Follow-Up Care

Top 10 Tips for Choosing Hand and Foot Orthopedic Implants

Tip 1: Confirm the surgeon’s specific expertise. Ask how often they perform hand or foot implant procedures. Experience with small bones, tendons, nerves, and complex joints matters. Request an explanation of the planned procedure, expected movement, and possible limitations. A skilled surgeon should discuss alternatives without pressuring you. Clear answers build trust.

Tip 2: Examine device quality, not just the name. Ask what material the implant uses, how its design suits your bone, and what evidence supports it. Request information about imaging, sizing, and how the device is placed. Quality decisions require more than attractive claims. One overlooked detail can affect comfort. I might focus too much on the implant itself, while surgical technique and bone health also influence results.

Tip 3: Confirm follow-up care before consenting. Ask who will review your wound, manage swelling, and guide rehabilitation. Hand and foot recovery can involve splints, exercises, walking limits, or temporary work changes. Get realistic timelines in writing. Do not ignore increasing pain, redness, drainage, numbness, or sudden loss of movement. Early contact may prevent a small concern from becoming serious. Follow-up should feel planned, accessible, and personal, not like an afterthought.

FAQS

What should be defined before choosing a hand or foot implant?

Identify the affected bone, joint, tendon, nerve, and functional limitation. A painful toe may involve joint damage, infection, or poor bone quality. Small details matter. The treatment goal may be stability, correction, pain relief, movement, or load transfer.

Can imaging alone determine the best implant?

No. A radiograph may show alignment or bone loss, but it may miss the main pain source. Clinicians should compare scans with movement, sensation, circulation, and daily needs. The first interpretation may be incomplete.

What patient factors can affect implant selection?

Bone density, smoking status, diabetes, activity level, body weight, and healing potential matter. A warehouse worker may need different function than a pianist. The scan should not choose the implant by itself. Reassessment can prevent a poor reconstruction.

What evidence should patients review before surgery?

Compare reliable studies involving similar injuries, follow-up periods, and patient ages. Ask about material, fixation, stability, wear, and expected movement. A smaller device is not automatically safer. Attractive claims can distract from practical evidence.

What risks should be discussed with the surgeon?

Discuss infection, nerve irritation, stiffness, loosening, fracture, and revision surgery. Ask how the implant may affect movement and daily tasks. A second opinion can help when the recommendation feels rushed. Pressure is a warning sign.

How can patients assess surgeon expertise?

Ask how often the surgeon performs procedures involving small bones, tendons, nerves, and complex joints. Request clear explanations of alternatives and possible limitations. Experience matters. The surgeon’s technique and bone health may influence results as much as the device.

What does recovery usually involve?

Recovery may include splints, wound care, therapy, walking limits, or temporary work changes. Driving restrictions and weight-bearing limits should be explained before surgery. Some patients improve quickly; others need months. Recovery is rarely linear.

What symptoms require prompt follow-up after implantation?

Contact the care team about increasing swelling, redness, drainage, fever, numbness, or sudden instability. Also report sudden loss of movement or worsening pain. Keep implant records and attend planned scans. “Permanent” does not mean maintenance-free.

Conclusion

Choosing the right orthopedic implant for a hand or foot procedure begins with a clear understanding of the injury, deformity, or medical condition being treated. The implant should match the patient’s anatomy, functional needs, bone quality, and surgical goals. Important considerations include the material, design, biocompatibility, size, fit, stability, and compatibility with the planned surgical technique. A well-matched implant can support healing, restore movement, and reduce the risk of complications.

How to choose orthopedic implants for hand and foot procedures also requires reviewing clinical evidence, potential risks, expected recovery, and long-term performance. Patients should discuss the surgeon’s experience with similar procedures, the quality and traceability of the device, and the follow-up care available after surgery. Careful evaluation and shared decision-making help ensure that the selected implant is safe, appropriate, and suited to the patient’s individual condition and lifestyle.

Mason

Mason

Mason is a seasoned marketing professional with a deep expertise in the company's offerings and a passion for driving brand awareness. With a strong background in digital marketing strategies, he has an innate ability to connect with diverse audiences and effectively communicate product benefits.......